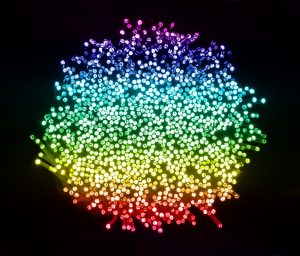
It can be very cool to have a night sky on your ceiling. It’s a great conversation piece, adds beauty to your home, and brings the wonder of the universe down in a miniature form to your house. It might seem kind of tricky to use fiber optics considering that this is usually something that is painted, but it’s in fact quite simple as long as you do it properly.
In this article, we’re going to take you step by step in order to show you just how to get that great night sky effect inside of your home.
Required parts and tools
Important on your list should be a good shop light. You need good lighting in order to see what you’re doing, especially when you have to keep turning your lights off to test whether the light-stars are showing up correctly.
You’ll also need a good tacky glue that will get your fiber optics up there and keep them there. There are a variety of tacky glues out there, and you can’t really go wrong with any of them.
This next one is optional, but you can get a guide book in order to map out the constellations yourself. This can be cool for that aficionado who wants to perfectly and accurately represent the actual stars in the sky.
A cordless Dremel is needed, and we mean cordless when we say corded. It’s technically possible to use a corded Dremel on the job, but it will drive you crazy at every step of the job.
A portable work light can be very useful, especially when it’s specifically pointed the way that you need it to be for the job.
You should also invest in a good speaker system so you can play music while you’re working. The silence and monotony will drive you crazy, so you should counteract this with something that’ll keep you motivated and keep you on task.
The first thing you need to do is select which kind of setup you’re going to use. Halogen will be able to use a flicker wheel in order to replicate a twinkle effect in the stars. LED, however, has the twinkle effect as well as a blinking effect too.
When it comes to deciding which one to go with, it could be all about price. Halogen are a little cheaper, but they don’t have that blinking effect. LEDs are more expensive, but they have that blinking effect and overall look to be of a higher quality in general.
How to do it
After all of this, you’ll have to drill and mount your illuminator in order to get started on the display. After drilling, you’re going to want to push the fiber optic cable through the ceiling.
The next thing you’ll have to do is get up into the attic and drill holes for the stars that you’ll be putting up. You’ll have to remove insulation in order to get where you need to go. Be careful, as insulation can be pretty annoying to deal with.
Once you’ve drilled out the holes and filled them up with tacky glue, you’re going to need to replace that insulation that you moved away from the area. You don’t want to leave any part of your ceiling uninsulated.
The next step is to cut off the extra fiber optic cable. If you’ve followed all of the steps so far, you should be left with fiber optic tendrils hanging from your ceiling, The best thing to do here is to use nail clippers to cut them down to size.
The next step is to check for errors. That’s pretty self-explanatory there.
The next thing you want to do is enjoy your new starfield ceiling! It’s pretty awesome to see the setup complete and gorgeous as it no doubt will be. This is the perfect add on to just about any home or home theater.


