 So, your sacred garden storage shed, the place where your keep your gardening “arsenal” and precious tools, is in need of your immediate attention. Your current shed roof felting has served its purpose and it’s time to tell it to hit the showers or else it will ruin your garden landscape design (by that we mean sending it to the nearest dump). Sure, replacing the felt might seem like a strenuous and time-consuming job but look at it on the bright side – it’s something you have to do only once every decade or two. Also, once you are done, you can be sure that all your tools and equipment will be protected from the volatile aspects of the elements.
And to make it easier for you, we’ve broken down the entire process into six simple steps that you can follow.
1. The Things You’ll Need To Fix That Roof Felt
Well, aren’t you in luck today! Chances are you already have everything you need inside that shed of yours. For easy reference, here’s a list for you to follow:
- Step ladder (even if your shed is not among the highest, you will be more comfortable working with a steady ladder)
- Craft knife
- Tape measure
- Hammer
- Paint brush
- Wood nails
- Felt nails
- Some roofing felt
- Quality felt adhesive
Alright then, that should do it. Hopefully, it’s a sunny day, your schedule is free and you are ready to give that shed of yours all you got. Which kind of brings us to the step.
2. It’s Time To Remove The Old Felt And Kiss It Goodbye
Probably the first thing in your way would be the timber boards. Remove the nails that hold them down with your trusty claw hammer. After this, strip the old felt. You can use a knife or whatever you see fit for the task. Just be sure that when you are done, the surface will be completely free of random debris and nails. And here’s a neat trick, if you are unable to remove a certain nail, just hammer it down flat so it won’t be in your way.
3. Measure The Amount Of Roofing Felt You Will Need
The first thing you need to do is measure the dimensions of your shed roof. To put it simply, you are going to need enough material to be able to cover the entire roof with at least 5cm extra left on each side which should be enough for overlaps at the eaves. For the gable ends, you are going to need about 8cm extra. For most garden sheds, 3 pieces of felt should suffice. You will need one for each side of the roof, and a third piece that will be overlapping the two side panels with at least 30cm on both sides.
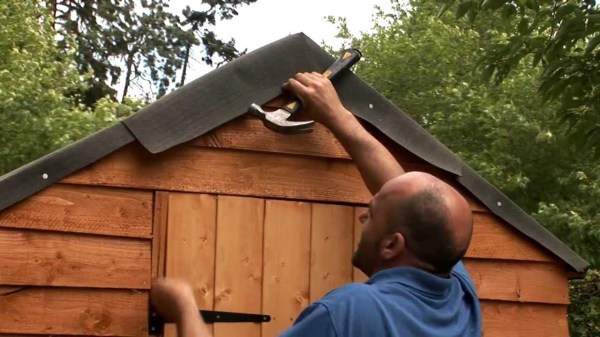
4. Applying The New Felt
So, get on that ladder again and place the new pieces of felt. You need to apply the cut felt to both sides of the roof. Pull it tight so that it will be perfectly flat before you finally nail it down. Go along the length of the roof just bellow the apex and place a nail every 10cm. You can hammer the nails at the bottom edge of the roof at much wider intervals than that – let’s say 30cm just in case. You can add the top section once the side panels are secured in their places. It should cover the top section of the ridge – apply some lasting adhesive with a paint brush and press it firmly. Then you can put some nails at the lower edge – one every 5cm should do the trick.
5. Take Care Of The Pesky Overhangs
In essence, you are pretty much done with the job. However, there are few finishing moves to make it perfect. Fold the overhangs at each corner and nail them. Use your craft knife to make a small cut in the overhanging felt just at the apex of the roof, then you can fold it and nail it at about 10cm intervals.
6. Put The Fascia Boards Back
Re-attaching the roof boards is the final thing you need to take care of. You can use wood nails to secure the folded roofing felt. After that, remove any excess material with your craft knife.
Well, there you have it! Now that you’ve successfully replaced the shed roofing felt, chances are you won’t have to deal it again in the next 15-20 years.Now how about some home-made lemonade to celebrate a job well done?