 In today's highly technological world, everything can be learned with the help of the internet. From tweaking up your device to boosting your PC's configuration, all you need to do is to search video tutorials online. Compare to other forms of learning, video tutorials are way more powerful to transfer knowledge. It provides exact visuals and presents actual demonstration of the process.
With its soaring high popularity, many teachers are now making video tutorials not just to help their students to have a more intuitive understanding, which other people also create demos to gain income through advertisements. However, creating video demos or tutorials can quite be challenging especially if you are a newbie on this area.You need to have the right tools to help you get started. But with tons of screen recording software, choosing which one to use can be confusing. To ease your burden, check out these great video tutorial applications below.
Another online-based application that needs not to be installed is the Screencast-O-Matic. This program can record your computer screen as well as webcam for 15 minutes, directly publish clips to YouTube and convert files into different formats. However, the free version of it is very limited. If you want to enjoy the full features of this software, you need to purchase the licensed version priced at $15 per year.
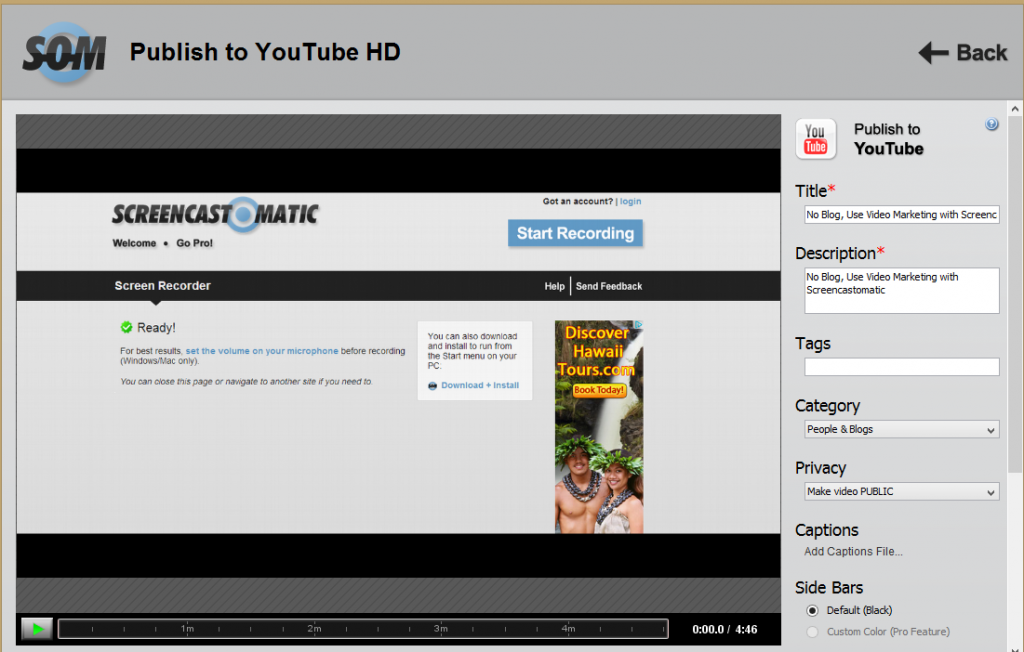
To use Screencast-O-Matic, just click the "Start Recording" button on top. And then, select which part of the screen to record by adjusting the rectangular frame. Also you can choose the appropriate video quality and audio input. When settings are done, just tap the "Record" button. After that, you can click "Stop" button to finish the video and on the right panel you can edit the clip or directly share it online (for PRO users).
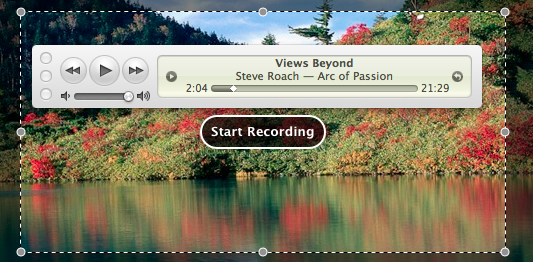
Aside from being a wonderful all around multimedia player, Quicktime can also record your computer screen. You can grab your full desktop screen or portions of it together with audio narration if you want. Although Quicktime comes fully compatible to both Windows and Mac OS, the screen recording feature is only available to Mac OS X 10.6.8.

To create video demos using it, all you need to do is open Quicktime player on your PC. Then, click "File" menu and choose "New Screen Recording".Ater that, a small screen recording window will appear, then you can select the appropriate audio input by clicking the downward arrow. Next, tap the red"Start Recording" button to capture your screen.For recording screen portions, adjust the pointers by dragging the gray circles. Once you want to finish the recording just press "Stop" button to finish it.
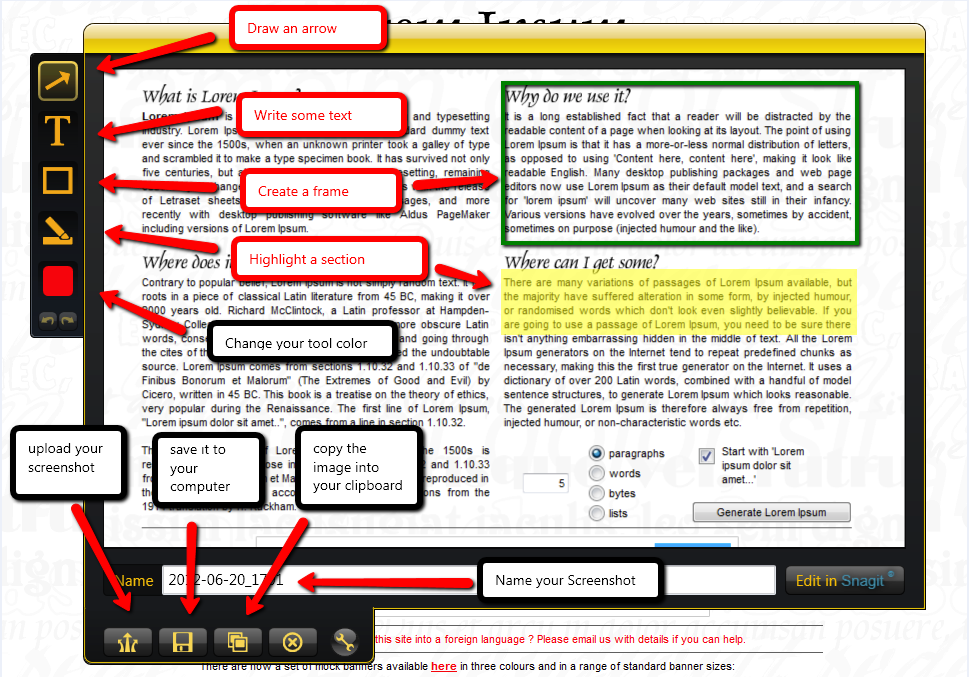
Jing is a free screen capturing tool compatible to both Windows and Mac OS. This screen recorder comes with a stunning line up of features from complete recording capabilities to powerful editing functions; everything is truly efficient with it. You can use it to capture full or selected parts of your screen, mark up your screenshot, insert text boxes and shapes, highlight certain parts, add picture captions, and more.

On the other hand, do note that the video recording capability of Jing is only limited to five minutes of video. Great for making short video demos, using it is easy:
- After installing Jing, hover your mouse over the sun icon and click the cross hair button.
- Click "Capture" and select the area on the screen you wish to record by dragging the cross hairs.
- When the recording is done, you could edit the finished video or share it online through different channels.
Unlike other applications where you need to install it on your PC just to start using its services, Apowersoft Free Online Screen Recorder requires no software installation because it is aweb-based app that does everything online. It is 100% free to use with no registrations, memberships or even payouts required. This software can record your PC screen within a click of a button. Equally, it can capture both audio and video at the same time. Complete with other features such asthe ability to capture webcam, create screenshots and built-in editor makes it a highly recommended tool for all video tutorial fanatics.
With it, you can record your desktop screen as long as you want. There are no time limitations and file size restrictions with this online software. Whether you want to record full shows for class lecture or lengthy films, everything is unlimited withthis free online screen recorder. To start recording your screen, simply:
- Visit Apowersoft Free Online Screen Recorder website and click "Start Recording" button.
- A notification pop-up of the Java applet will appear and hit "Allow" to give permission to run this screen recorder.
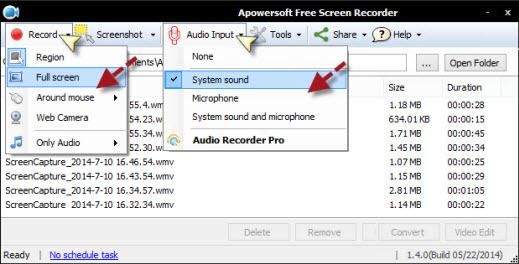
- After the program loads, configure the audio input and recording settings according to your preferences.
- Tap "Record" button and then select which part you wish to capture by adjusting the red frame.
- After that, just press the "Start" button to begin recording your screen.
- Simply click "pause" or "stop" when done.
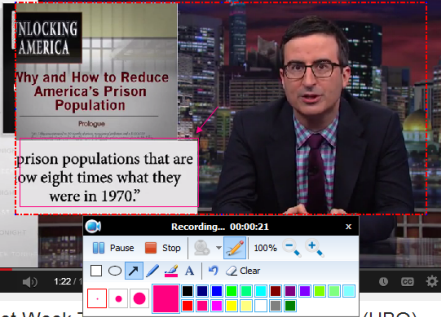
While recording, you could also annotate the video by adding lines, arrows, text, shapes or special effects like highlight and blur on the toolbar. Another compelling feature of this recorder is that it gives you the ability to create recording schedule task. Once a scheduled task is created, it will automatically record your screen at specific time you set.
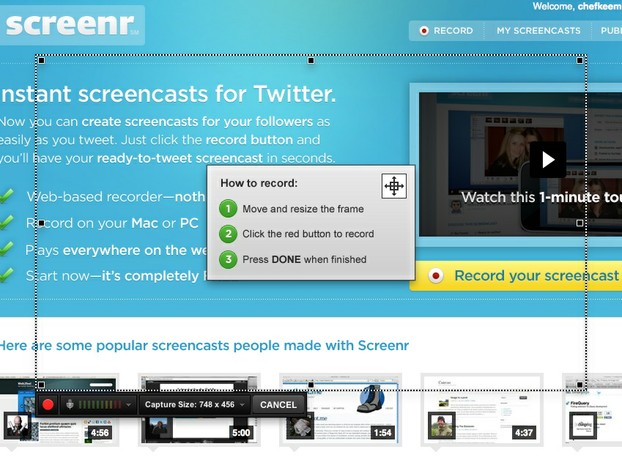
Screenr is yet another online-based desktop screen recorder. It can record any part of your screen together with an audio from your microphone. What makes this program wonderful is that using it is 100% free with no limits or video restrictions. Furthermore, Screenr allows recording up to 2560 by 1600 which is great for making HD vids. This program is compatible to both Windows and Mac OS. To start making video tutorials:
- Open the webpage of this recording website and click the "Record" button on top.
- An adjustable frame will appear to which you can moveby dragging the edges.
- Select what part of the screento record and tap the red record button below.
- Hit "Done" once finished.
- Save the video on your PC or share it via Facebook, YouTube and Twitter.
There are many ways on how you can create video tutorials. And with the above mentioned tools, sharing your knowledge to the world becomes nonetheless easy and convenient.