 Tiles are the most popular construction element that is widely used today. It is cheaper than other materials and can easily be installed. We have presently seen a lot of DIY projects with tile. Many expressed that a DIY project with tiles helped them overcome depression during the 2020 pandemic. For our readers, who are looking for an easy DIY tutorial, we are going to go over step by step. If you can follow the steps properly, we can assure you that you’ll get a decent tile job in your backsplash wall. It may possess a challenge for you the first few times, but with practice, you will be an expert in no time.
Tools and Materials
Before starting, you’ll need to gather some tools and materials. That way you can give your full concentration in your work later. The necessary tools you need are,
- 4-in-1 screwdriver
- Bucket
- Caulk gun
- Drill/driver
- Grout float
- Level
- Non-contact voltage teaser
- Notched trowel
- Rubber mallet
- Self-centering drill bit
- Tape measure
- Utility knife/wet saw
These tools will help you to install the tiles effectively and beautifully. Now, the following materials will be required to set your tiles in place.
- Caulk
- Grout
- Grout sealer
- Mastic
- Outlet extenders
- Stone tile sealer
- Tile
- Tile spacer
With these things in your hand, you are ready to beautify your backsplash wall with tiles.
Installing Your Backsplash Tiles
#Step 1: Make a design for your backsplash look. You can chalk it out on paper or just in your mind. If you decide to install the tile directly on the wall, start from the middle tile. And then work your way around it. It’ll ensure that all your tile is in a similar row and column.
If you are working in a corner, start from there. This way you won’t lose the perspective in the middle of your project. However, if there’s a window present, start from the bottom middle portion of the window. The frame of the window is your focal point. So it’s very important to evenly spread out the tiles in this portion. In any case, you need to have a vision of how the finished project would look like. And work your way towards it.
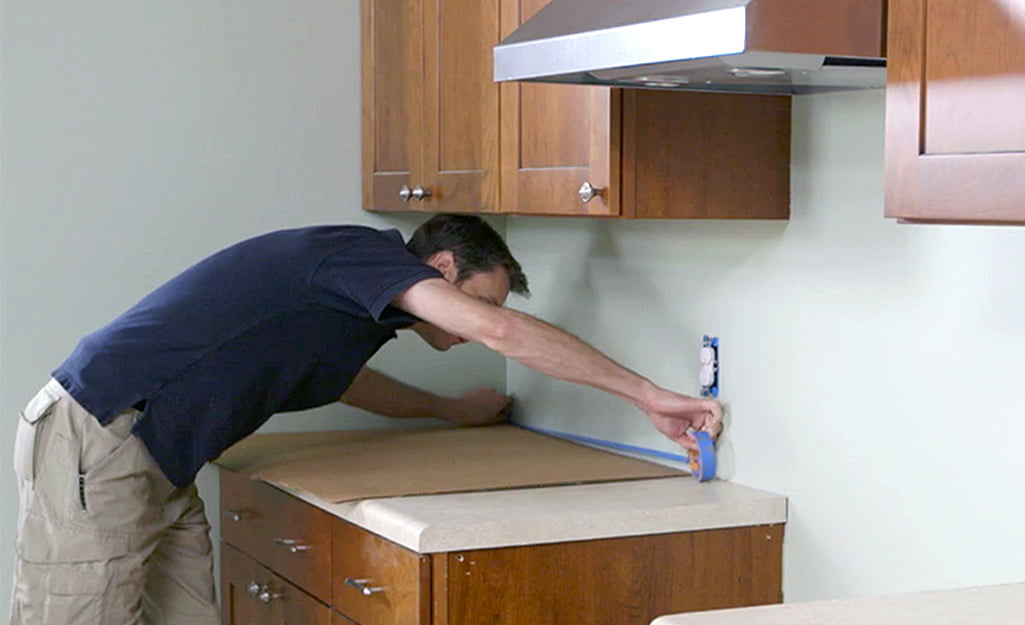
#Step 2: In this step, you need to shape your tiles according to the space. You may need to slice it to fit in the edge or cut a notch to work your way around utility outlets. You can use a utility knife or a wet saw for this purpose.
#step 3: Now start placing your tiles. Start from the bottom row and work your way up. That way, if you level the bottom row, you can build on top of that. Apply some mastic in the back of the tile by using the trowel. Some may prefer to put the mastic on the wall. But putting it in the tile is cleaner. Apply it plenty and evenly all over the tile. Too little mastic will cause the tile to fall off, and too much will squeeze out some of the mastic. Although, mastic is not recommended to use on a wet surface. Place the tiles firmly and continue placing them in the bottom row. Place tile spacers after installing each tile. When a row is finished, check out if it’s even with a level. Make the entire row as even as possible.
If any mastic comes out during installing, clean it up as soon as possible before it sets up on the tile.
#Step 4: Cut the corner pieces as you reach in the corner. Measure the distance of the wall to the closest tile and subtract twice the space of the tile spacer you are using. Cut the tile. Some may use tape to mark the area of the cut. It’s a good practice as it helps to visualize it clearly and can prevent tile breaking. Apply mastic and install the piece.
#Step 5: Repeat step 3 & step 4 for the upper rows. Here you may find some utility outlets. Rather than cutting directly around the tiles, trim small sections around the designated area. It’ll help you easily cut the space you need in your tile.
#Step 6: Finish the last row. You may or may not need to cut it. If needed, follow step 4 and you get your finished structure of tiles on your backsplash wall.
#Step 7: Wait 24 hours to make the mastic to the wall. Then remove the tile spacer and your wall is ready to grout. Mix the grout with water in a consistency of cake batter. Then with a help of a float, smear it across the tile. Apply it in an angular motion. That way it’ll fill all the vacant space between the tiles. Go from one side to another and come back in the same way. That way, any excessive grout will be scraped off. Work in a small space and cover all the tiled areas. Then wait for 15 minutes. And the grout is ready to wipe.
Use a grout sponge to wipe off the grout from the tile surface. Make sure to not make the sponge dripping water. Change the water quite a few times, and clean the sponge thoroughly.
#Step 8: Now it’s time to cluck. All the edges, corners and where the tile met countertop should be clucked thoroughly. The color of the cluck should match the grout. Now you have a great backsplash wall and all done by yourself!
Conclusion
Installing tiles in a space can be felt like solving a life size jigsaw puzzle. Only, it is easier and can give a bigger sense of accomplishment. Once you get used to working with the tools, you can decorate or redecorate your own home at any time. Hope the tutorial was helpful for you. Live your best life and make good choices.