The ISO of your camera is one of the three most important pillars of photography. The other two consist of aperture and shutter speed but I won’t get into those two in detail, especially in this article. In this article, we’ll talk ONLY about ISO in particular.
Every photographer needs to understand the concept of ISO in thorough details so that they can get the maximum out of their camera and take the best photographs of all depending upon the nature of circumstances. So let’s begin on this topic without further ado. A beginner having no prior idea of this subject may benefit tremendously from this article.
First things first: What is ISO?
In layman’s terms, it can be said that ISO is the sensitivity level of your camera to the available light. The low the ISO number, the less sensitive it is. A higher ISO number, on the other hand, increases the level of sensitivity of your camera.
An ISO scale usually starts at 100 and continues on an ascending order. The values usually double and end at a specific point like this scale right here-
*100, 200, 400, 800, 1600 and so on.
This widely used ISO standard is introduced by the International Standards Organization.

The effect of ISO on exposure
Like I said in the introductory paragraph, the exposure of a photograph is affected by THREE things in particular and one among them is ISO.
The ISO scale is quite similar to that of the shutter speed because when the value of ISO is doubled, the exposure also gets doubled at the same time. Both are proportional to one another.
Hence, we can easily say that a lower ISO value is directly linked to lower exposure whereas a higher ISO value is linked to that a higher exposure; yep, it works as simple as that. So make sure you know it by heart and implement it as per your requirements.
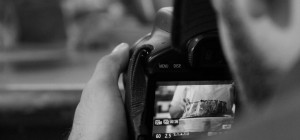
Here’s an example of an image that’s taken with a very low ISO value to get the minimum possible exposure.

Explaining the different ISO numbers
I already said it before that ISO numbers usually start from 100 which is also known as the base ISO and it increases in an ascending order by doubling the value of its precursor (refer to the series* displayed above).
The point that you should remember here is the fact that each step between the values effectively DOUBLES the sensor sensitivity. Meaning, ISO 400 is twice more sensitive as ISO. The more the sensitivity, the lesser the time it’ll take to capture the photograph.
The following key can explain it better:
- ISO100 equivalents 1 second.
- ISO200 equivalents ½ of a second.
- ISO400 equivalents 1/4th of a second.
- ISO800 equivalents 1/8th of a second.
- ISO1600 equivalents 1/15th of a second.
Hope you get the point easily from the list depicted above. This diagrammatic representation can also explain it better.

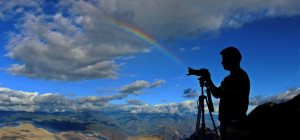
When should you use low ISO?
It’s more advisable to shoot with the lowest possible ISO in your camera when there’s plenty of light all around you. This will give you the sharpest and the best image quality.
Here’s an example for you-

The image above is shot with base ISO (the lowest possible ISO of your camera i.e. ISO 100)
When should you use increased ISO?
If the level of light is low around you, it’s advisable to shoot with an increased ISO. Such a tactic can also help to prevent the image from getting blurred as a result of low light.

Higher ISO for low light just like the image shown above
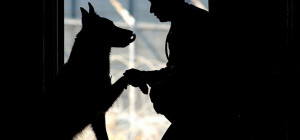
You should also use low ISO while capturing photographs of objects in motion. An example image is shown below.

For objects/subjects in motion, use low ISO
The ISO cheat sheet
Everybody loves a cheat sheet. So here is the ISO cheat sheet for you. If you are a beginner, you might benefit tremendously from it.
- ISO100-200: For daytime.

Daytime photography
- ISO200-400: For indoor photography.

Indoor photography
- ISO 400-800: For shooting indoors WITH FLASH.

Shooting indoors with flash
- ISO 800-1600: For low light event and landscape photography.

Low light event photography
- ISO 1600-3200: For extreme low light photography like night time photography without the aid of a tripod.

Extreme low light photography
- ISO 3200+: For artistic photographs. A grainy effect is bound to come as a result of this range.

A grainy effect as a result of high ISO
So that pretty much brings us to the end of this article. Hope you had a good and useful read.