 Obviously, knowing how to effectively save your document is an important part of using Photoshop. Photoshop gives you the option to both ‘Save' and ‘Save As', just like you would use in most other programs. Both of these options are listed under the ‘File' menu.
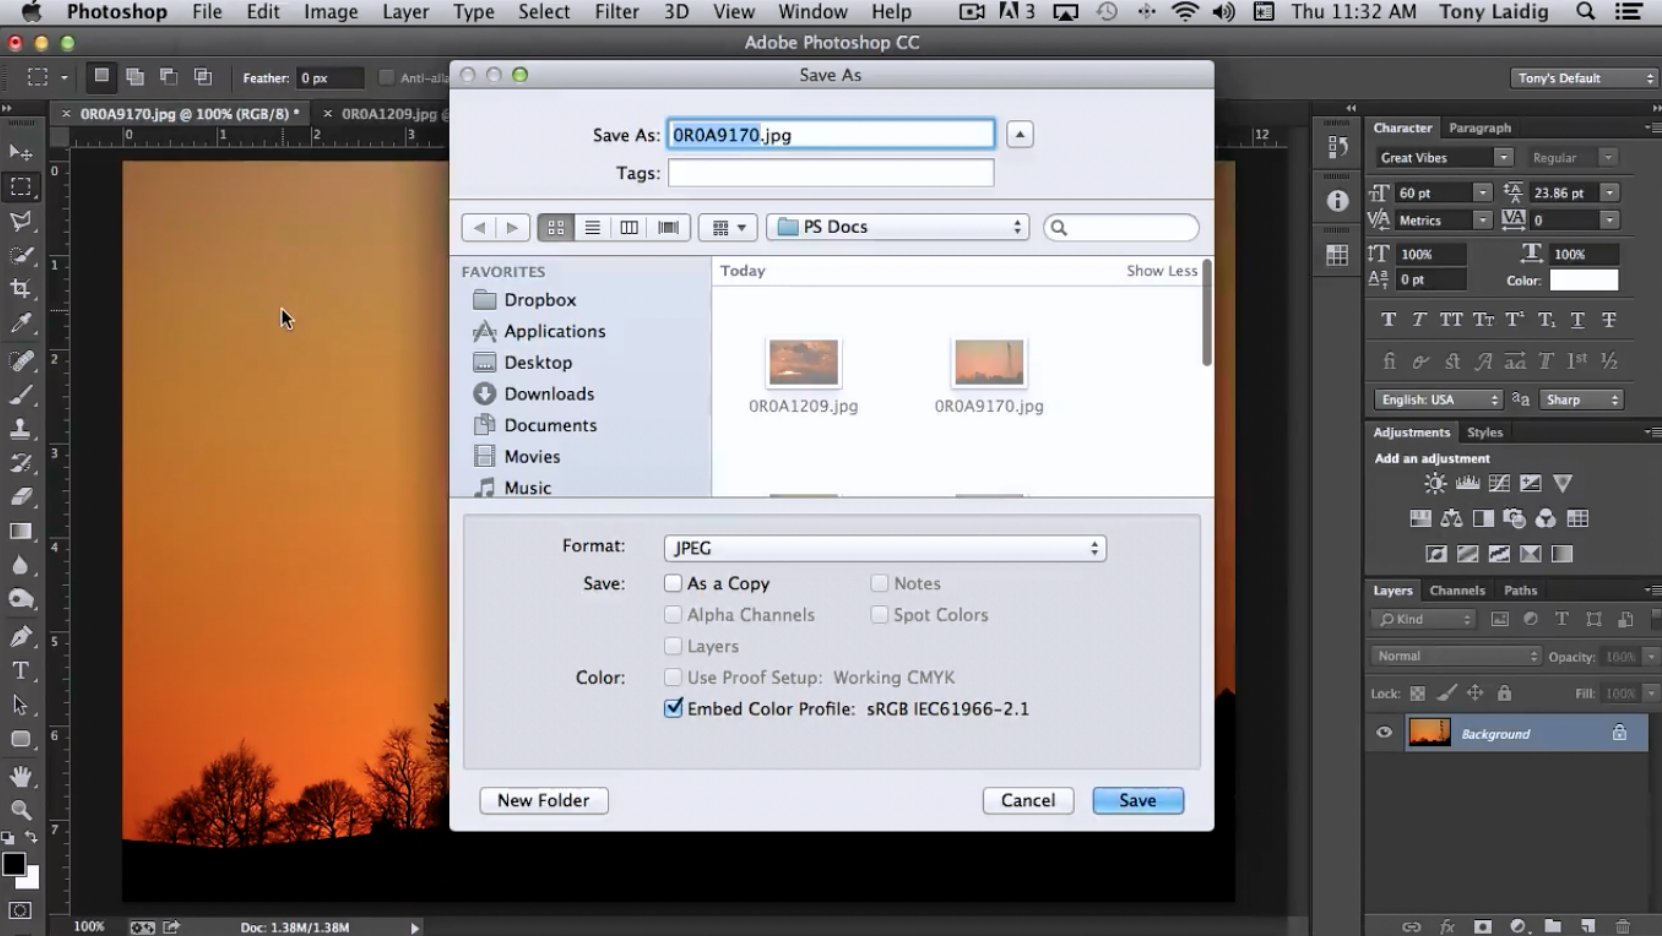
It would be preferable to use ‘Save As' in most cases, but that of course is up to you. Whenever you choose ‘Save As', a window will appear which allows you to change the file name and the file's destination if you like. It also will allow you to see or change what format your image is being saved under.
Photoshop allows you to save your image in a number of different formats. You'll use some of these on a regular basis, and you may never use some of them at all. The ones that people most commonly use are:
• Photoshop (.psd) • JPEG
• PNG
• TIFF
• Photoshop PDF
The native Photoshop format (.psd) is one which you should use if you are making changes in Photoshop. This format allows you to save your changes in separate layers, and use paths, and basically keep things separate so that you can go back and edit details later. If you are done with your work, and you have saved a Photoshop version that you can edit later on (just in case), you may want to save a version in a different format.
If you are going to use an image on the Web, JPEG or PNG would probably be the two best options for you to select. If you are going to use the image for print, such as for a book cover or for a brochure, then you might want to save your image as a TIFF image. That's because this is a postscript file format that is fully compatible with the image setters that are used for print.
There is a Photoshop PDF format that is based on the Adobe PDF file format. This format also has the ability to maintain layers. You can also convert the layers into separate pages within the PDF. So, that is an option you may want to choose as well.
If you choose to save your image as a Photoshop PDF file, when you click ‘OK' a secondary window will appear. This window brings up the standard Adobe PDF presets. The default setting will be ‘High Quality Print', and it is recommended that you just stick to that unless you have a particular reason to change it.
Another one of the options that this window contains is the option to ‘Preserve Photoshop Editing Capabilities'. You'll want to make sure that you have this option checked if you are planning on making any changes to your file later on. You may also want to select ‘Optimize for Fast Web Preview'. Both of these options are usually selected by default, but it would be wise to take a moment to glance at them and make sure.
If you think you'll want to view the PDF after saving it, you will want to select ‘View PDF After Saving'. If you do, Adobe Acrobat will launch and open up the document as soon as you click on ‘Save PDF'. This will give you the opportunity to view your PDF and how it appears.

When you are saving your document, the default ‘Compression' settings are typically what you'll want to go with. The same thing goes for the ‘Output'. Under ‘Security' you are given the option to require a password, which you may want to do if it's a sensitive document you are saving. You can also restrict the ability for others to print, edit, or otherwise change your document. These options are shown in the picture above.
In the picture above, you can see that ‘Summary' is listed right beneath ‘Security'. This menu simply contains a list of the settings you have chosen. There's really no reason to change anything in this options menu either. When you are done making your selections, click on ‘Save', or ‘Save PDF in this case. Another window may appear which simply informs you that the version of your document that you are saving may not be compatible with earlier versions of Photoshop. In most cases you can simply click on ‘Yes' to move forward.
You can save your document multiple times, if you like, in order to have it available in multiple formats. You'll likely run into different options with each format that you choose. For instance, the PNG window allows you to select a different compression. You can choose between ‘None/Fast' or ‘Smallest/Slow'. In other words, you have the choice to not compress your image at all, which makes for a fast save, or you can save it with the smallest compression possible, but it takes longer for the file to save this way. There is also an ‘Interlace' option in this window. You can normally just choose ‘None' for this option, which it is set to by default. When you are done making your selections, click ‘OK' to finish the process.

When you save your image in the TIFF format, the window above will appear. As you can see, the first option you have within this window is to set the compression. It is recommended that you use LZW if you plan on using the image for print. Under ‘Pixel Order' you'll find two options: ‘Interleaved' and ‘Per Channel'. By default ‘Interleaved' will be selected, and you can just leave it at that.
Next, you'll be able to select the ‘Byte Order'. Here you will simply need to select whether this is being saved for a PC or a Mac. So, you simply need to choose the type of computer you are using. It is likely that you will ever use any of the other options within this window, so when you are done making the selections discussed above, click ‘OK' to finish saving.