Many people have this assumption that low light photography is synonymous to night time photography. That assumption is completely wrong.
Night time photography as a whole is a form of low light photography but low light photography as a whole is definitely NOT night time photography. Indoor photography can also very well qualify as a form of low light photography if it’s done without much ambient light.
Hence, I reckon that the general definition of low light photography as a form of night time photography counts to be invalid.
There are actually 3 levels of low light.
a) Visible: Low light in daytime. For example: Photography in the shadows like under large bridges or trees etc.
b) Dark: Night time photography to be more specific. It’s a situation where you can see only the brightest object and nothing else.

c) Low light: Photography done after sunset; dusk to be more specific.

Okay, now let’s go through a few low light photography tips that might come in handy for you in your upcoming photo shoot sessions. Let’s begin without further ado.
1. Turn your ISO up
Higher ISO settings result in noisy images. Yes, that’s true but don’t be afraid to turn your ISO settings up especially when low light photography is concerned.
Take the photograph without worrying about the noise. You can easily reduce the noise in your image with a bit of post processing at a later time. It won’t be much of a problem.
2. Shoot at a high shutter speed
Do you know the actual reason behind the occurrence of blurry images? The answer is simple and right to the point: “low shutter speed.”
In low shutter speeds, you’ll get a blurry effect from moving subjects. Naturally, it’s advisable to do the opposite. Shoot at faster shutter speed to reduce the blurry effect in your photographs.
3. Try to use an off camera flash
Do not use light in such a way that it hits your subjects straight on their faces. Instead, you should try to soften it through means of deflections.
If your light hits your subject straight on in the face, it might create all those harsh shadows that are definitely not photogenic from the point of view of your photo shoots. Use the world to your benefits.
When using a flash, try to bounce the light right off a wall or any other object to soften the intensity of the light. That’ll do you more good than harm to be honest.
4. Shooting in RAW is advisable
This will help you recover a few more details of a photograph even if you overexpose or underexpose it. You don’t get that many options with a JPEG image especially when recovery is concerned.
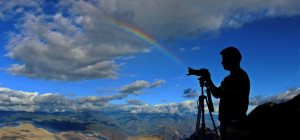
5. Use a tripod for low light photographs
If you want to prevent your camera shake, using a tripod for your photo shoot can be considered your best bet.
Use a tripod, set your ISO down and shoot at very low shutter speeds. You will definitely benefit from it.
6. Use larger aperture
A larger aperture is directly proportional to the amount of light entering into the lens. Shooting at f/6 allows the entry of more light in your photographs in comparison to f/18.
Always remember that the lower the number, the larger is the aperture.
Some thumb rules…
- Brace your camera against a wall or any other solid object.
- Relax at the time of holding your camera. A tense hand might result in a whole lot of camera shakes.
- Try NOT to zoom in on your subjects.
- Press the shutter like a sniper. Take a deep breath, exhale slowly and click.
- Press the shutter gently.
- Take multiple shots as backups.
- Use your camera’s exposure compensation capabilities.
- You can also use a remote shutter release to prevent camera shake.
- Use some form of a diffuser to soften the light.
- Go for a lens having vibration reduction or image stabilization technology.
Low light photography is a bit tricky indeed. But you can definitely excel in it with proper practice and dedication. Start with the very basics and you will definitely be an expert in no time. Good luck!
Contributed by: http://gulfphotoplus.com/